The desert lions strike back - Second game
Game2 against the Catalan Company
The second game saw the desert lions facing a Catalan invasion. Again, the foes decided to invade in winter to avoid the thirst. The battlefield was in a oasis rich area, this time the dunes were only on the right side of Tuareg deployment area and they didn’t play any role in the battle. The mayor feature was a 1FE oasis in the central sector that halved the battlefield. The battle was going to be fought in the left hand plain between the central oasis and 3 other oasis.
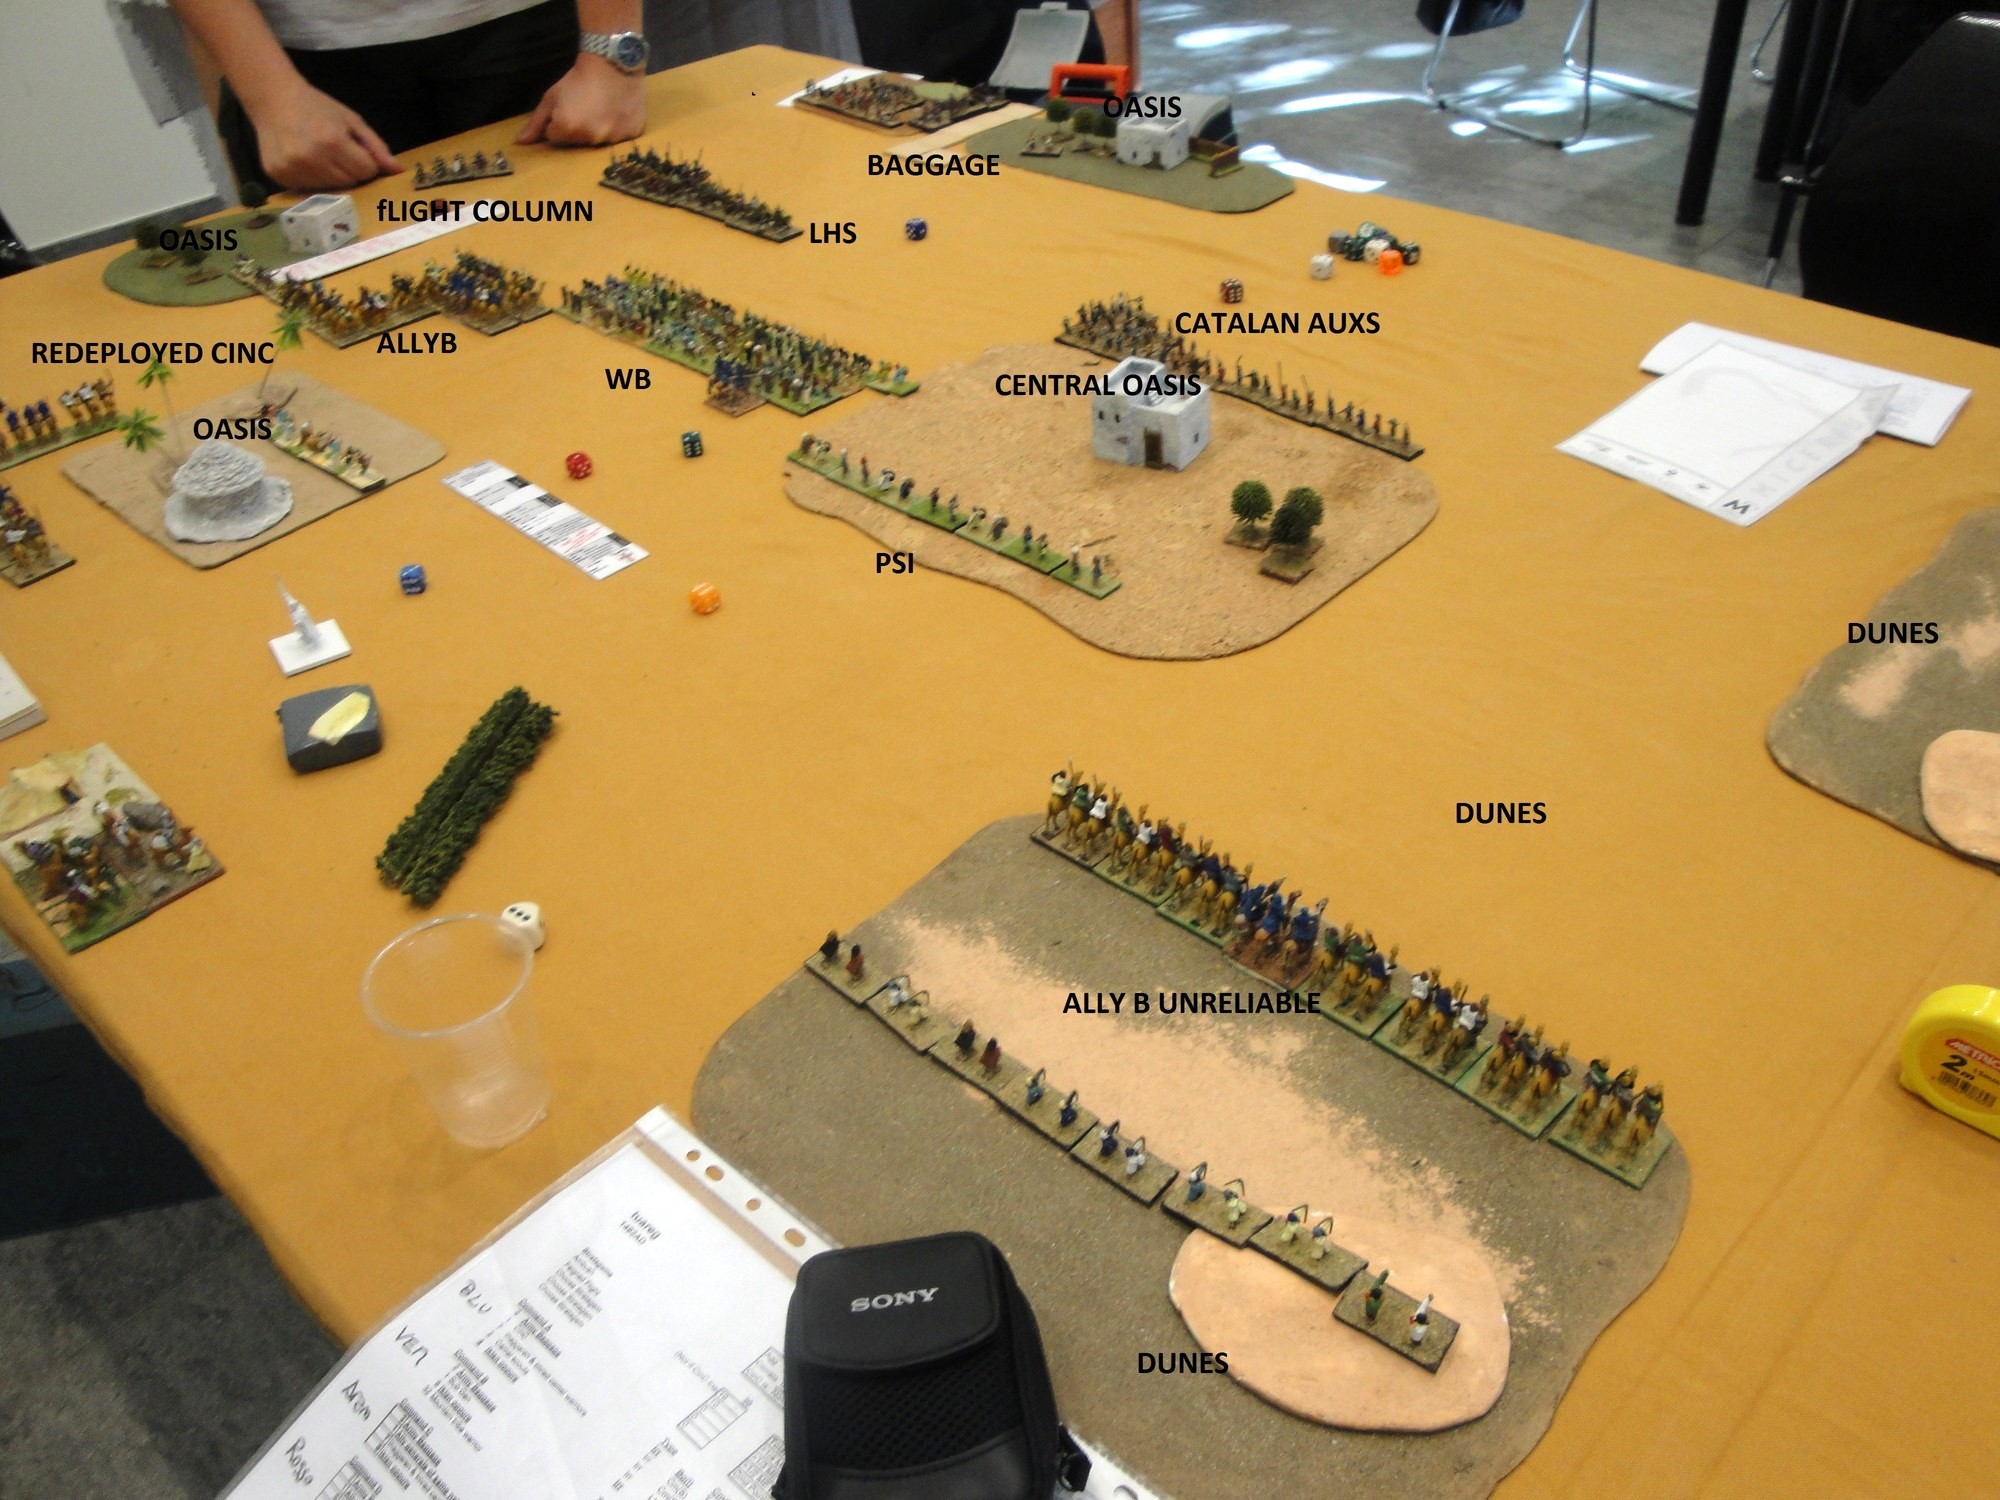
The Tuareg deployed with the Wb in four rows guarding the central plain supported by their Ps in the central oasis. In the right hand dunes Ally A stood in ambush while Ally B was protecting the flank of the Wb. The CinC stood behind the Wb ready to be redeployed where needed.
The Catalan scouts found the ambush straight away. The Catalans deployed 2 commands, the first of AuxS and LhS in the central plain with the task to engage the Tuareg camel command with the Lh and take control of the central oasis with the Aux. The second all Aux command was deployed on the flank with the task to support the Lh and infiltrate through the small oasis. The third one wasn’t in sight, most probably was on flank march on the Tuareg left flank.
On the first dice roll the Ally A was unreliable, the Ally B and Wb stood quite facing the empty plain while his Ps entered the oasis to fix the Catalan Aux. The CinC redeployed to close the door to the flank march.
The Catalans slowly advanced in the plain and in the central oasis with Lh and Aux of the first command while the flight column of the second command rushed for the small oasis.
this is the situation on the end of the second bound. The CinC is redeployed on the left flank ready for the march while in the centre the Catalan LhS are preparing their attack on Ally B who is closing his lines. Ally A is still unreliable.
Between the fourth and the fifth bound a savage fight involved the Ally B and the LhS in which Ally B got broken and the Lh got disheartened due to cumulative losses of Lh and of Aux who were involved in a fight in the central oasis with the Wb and Ps.
On the sixth bound, the Ally A got reliable and quickly redeployed towards the plain in support of the battered Ally B. By the seventh bound the flank march was announced on the Tuareg left flank. The Catalan decided to enter towards his half in support of the disengaging Lh who where at one element to be broken. In the meanwhile, a small part of Wb were attacking the Aux in the oasis and the remaining went impetuous towards the Catalan baggage.
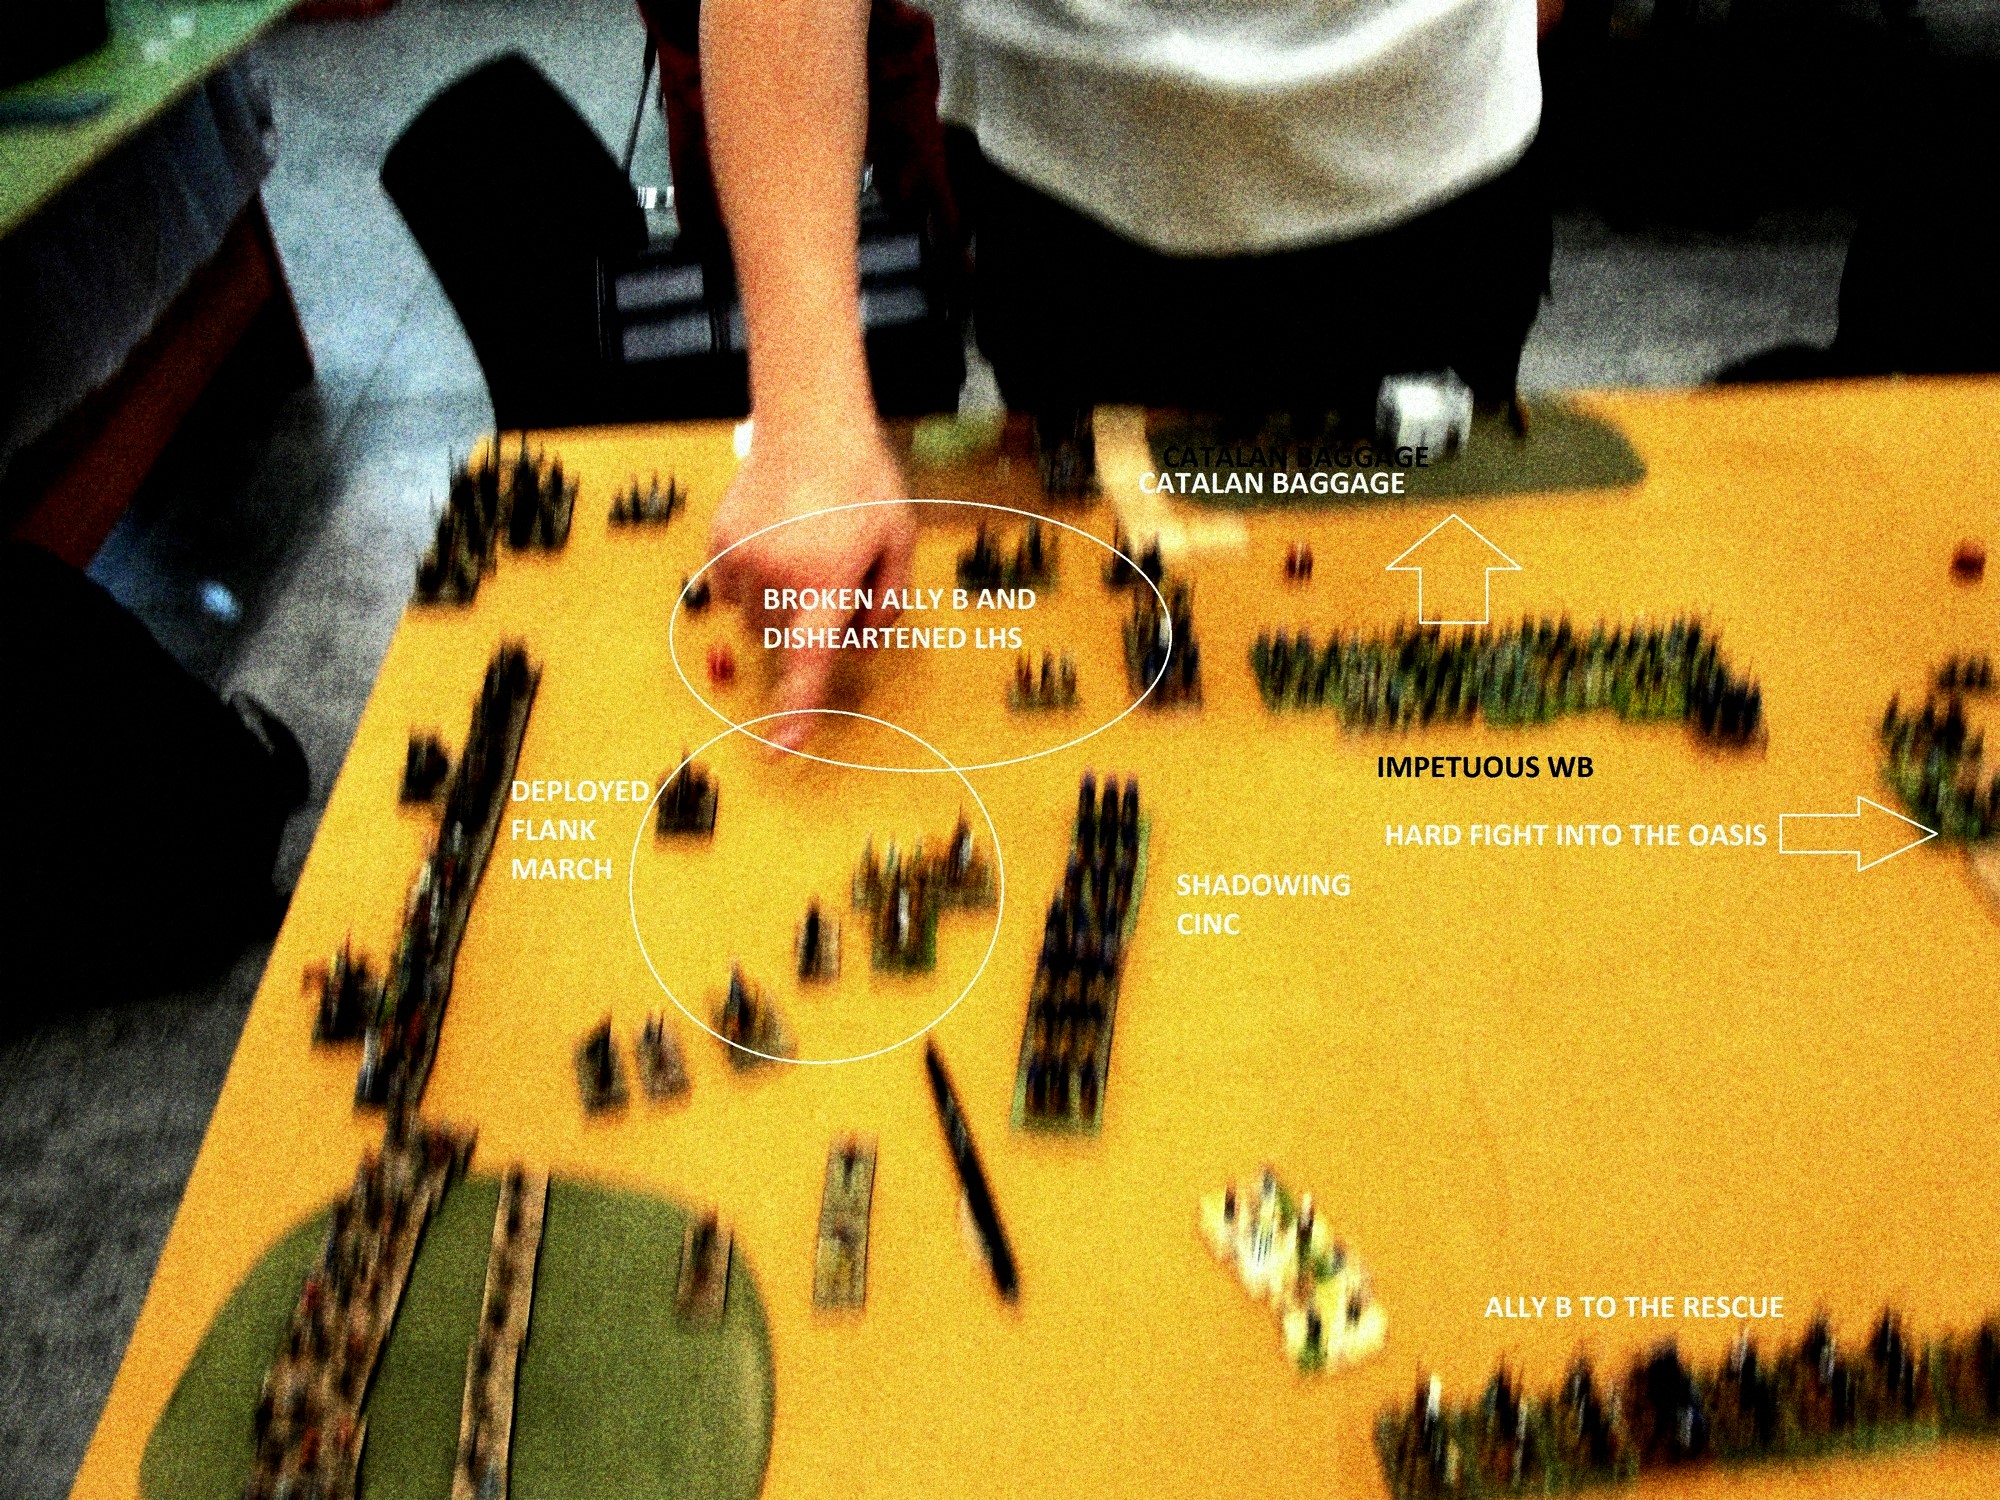
This is the situation at bound 9 with the Catalan flank march deployed, the Tuareg CinC shadowing and prepare to engage them and the Ally A at the rescue. In the next 3 bounds, the Tuaregs charged with both commands the Flank march loosing 3 camels to 1 Kn, while the Wb looted the Catalan baggage, killed 3 hordes of the all Aux command, one more Lh and 2 more Aux S. This made the Aus/Lh command to break and with the cumulative looses to trip over the 50% and break the army. Final result: 19-6 to the Tuaregs.
Overall assessment: The Catalan tried to manoeuvre his troop to get tactical advantage on the flank. However his flank march arrived too late allowing the Tuareg to redeploy the CinC and, once back on line, the Ally A. At the end, the impetuous Wb made the day by looting the baggage and killing the needed elements to break the Catalans.