No surrender!
A completed tournament report from its very beginning by Herbert Wong
Part 1
Introduction
Thanks Lorenzo and the Milanese players for holding the annual Italian DBMM Team Champion (ITC) for the DBMM players. The event in 2014 was grand and well received by those who have attended. It is a team championship using the Swiss System with each of the four players in every team playing in each of the four DBMM game pools. We have formed our team “Yellow Dragons” to participate in the 2013 championship. Our team ranked 7th out of 18 in the team classification in 2013. This year we form the team again with the same three Chinese teammates and a new teammate, Mr. Mark Gibson coming from N.Ireland. With:
Mark Gibson playing in Pool 1 with L.Sargonid Assyrian
Andrew Lam playing in Pool 2 with Alexander Imperial
James Cheung playing in Pool 3 with Early Byzantine
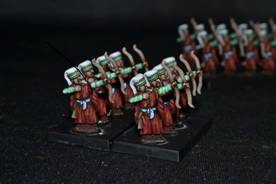
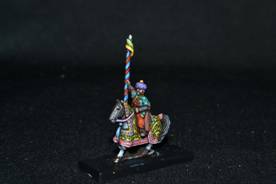
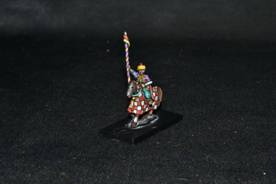
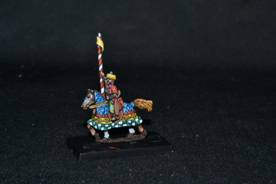
Herbert Wong playing in Pool 4 with WotR English
Before going to Milan, we have played more than one hundred practice games in Hong Kong after the 2013 Championship. Let’s go to Milan for glory!
Trainings and Army List Selection
My trainings and preparations for the Championship began shortly after
ITC2013. My Later Hungarians did well in the competition last year. I was hoping for a better result this year. I had decided to try my luck in the Medieval Pool again. Medieval Pool is probably the most complex one among the four pools. Complex because the army lists have a lot of variants and sub-lists with many different army compositions and possible combinations of troop types. Almost all the Superior Grade troops types are present in armies of Pool 4 with BwS and KnS in domination. On one hand, BwS can destroy targets in range by shooting at them but they can be quickly killed by charging Kn and will lose two ranks if defeated. On the other hand, KnS can smash and destroy almost every troop types just by frontal attack but they are expensive in terms of army points, plus they will flee if they have lost their close combat against Bow. That’s leaving me with two choices when selecting my army: either it is able to defeat these two dominating troop types, or I have to field both of these two troop types in my army.
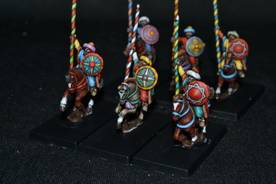
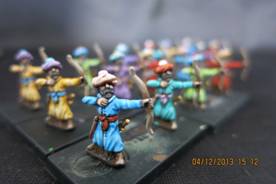
I have tested several armies for suitability. The first one was Serbian Empire, which is an irregular army with lots of IKnS, plus plenty of LHO and PsO, which are well suited for securing the flanks and supporting the Kn’s charges. I found it unsuitable after practicing with it for more than 3 months because the numerous Impetuous Irregular Kn in this army must pursue most of the times and they need too many PIPs to change directions or to hold them. Most of the opposing regular armies in the trial games just simply slipped away before my knights were in a position to charge it.
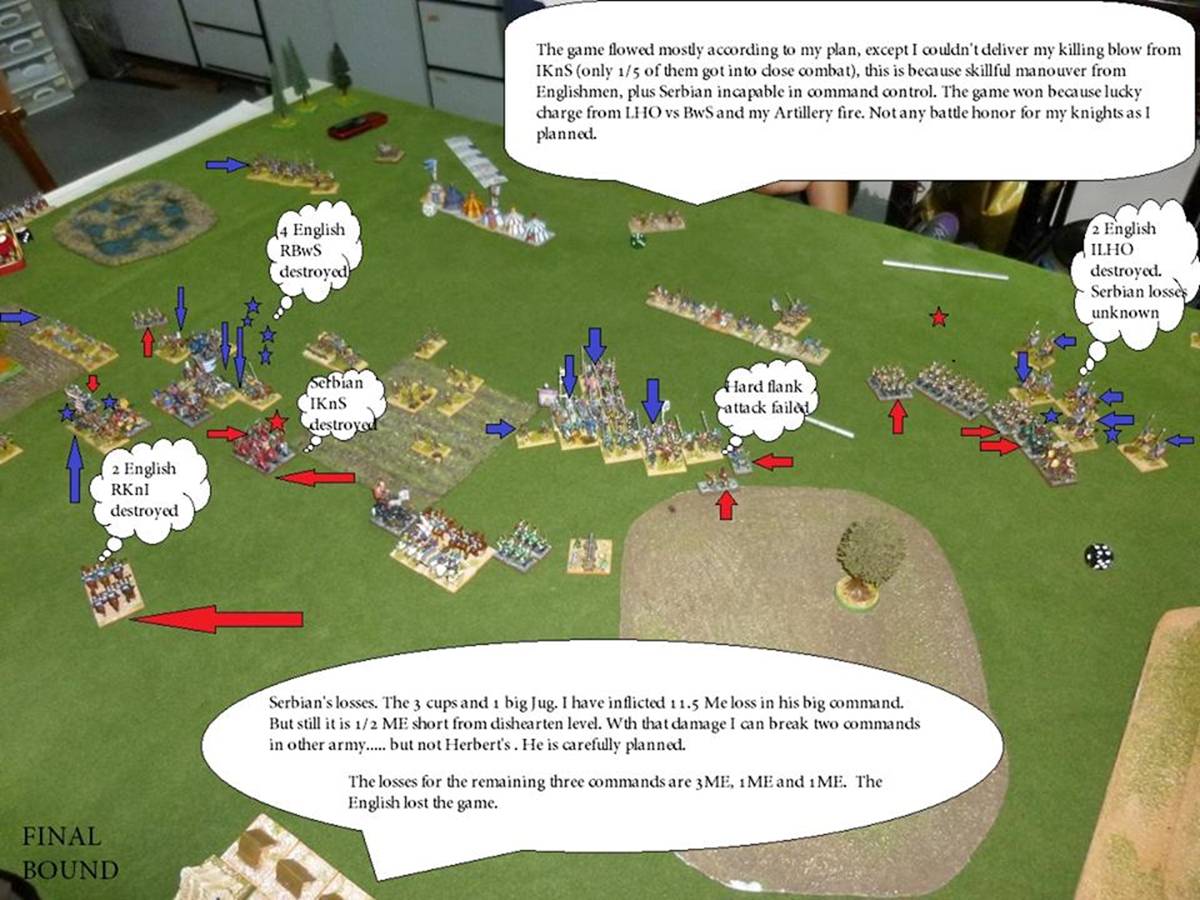
The photos below are from one of my Training game using Serbian Empire (vs. 100YW English).
http://hksw.freeforums.org/100-years-war-english-vs-serbian-condense-battle-report-t499.html

The other ones I have tested French Ordonnance, Later Swiss, Ghurid, etc. but I also found them unsuitable for reasons like: not suiting my playing style, mediocre table-top performance in fighting against the BwS and KnS combo, etc. In September 2013, I switched to Ottoman Turks which is an army with comprehensive troop types capable of dealing with all kind of situations in the test games. I even started painting it.
However, there are two weaknesses in this army list. Its compulsory choices had taken up too many army points, leaving only around 100 pts for me to field other troops. The predominant troop type for this army. is Cv which is not that good for battles in Pool 4. I have to heavily rely on the handful of Serbian Knights in this army to act as the striking hammer to break the enemy in a head-on battle. Once they are gone, I will lose the attack momentums.
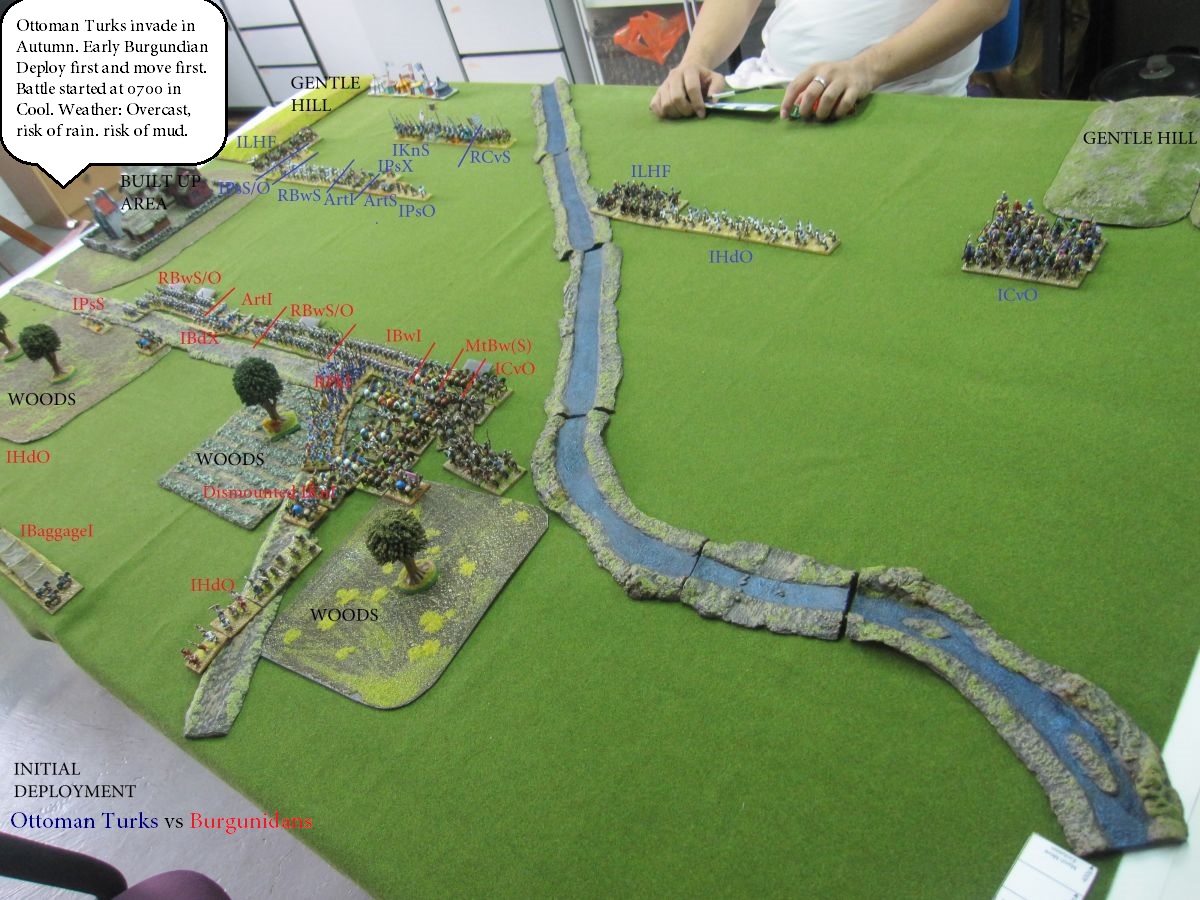
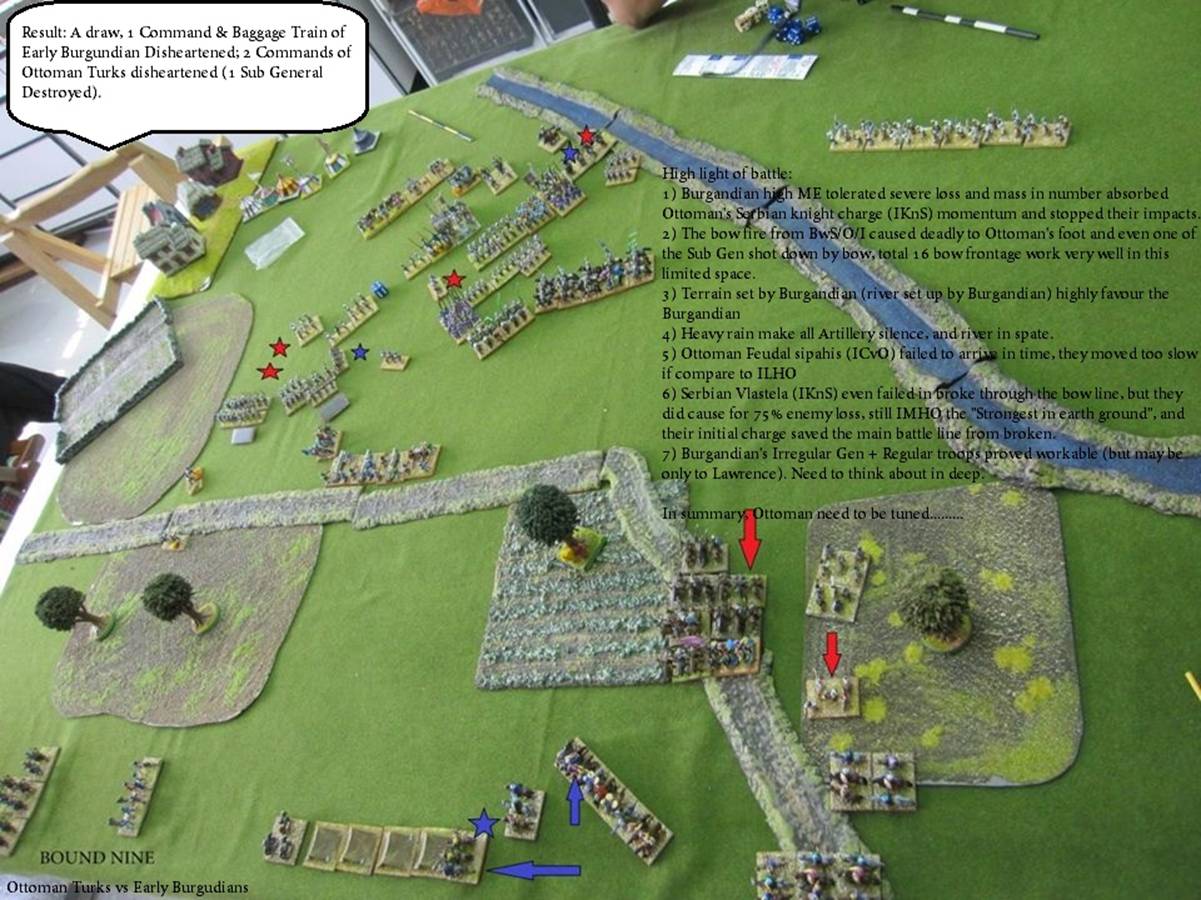
The photos below are from one of my Training game using Ottoman Turks (vs. Early Burgundians).
http://hksw.freeforums.org/ottoman-turks-vs-early-burgundian-battle-report-t494.html
It was a hard decision to switch to another army again as it was almost Jan 2014 and Chinese New Year long holidays would be coming soon. Then I have found the army War of the Roses English (“WotR”) capable of fulfilling all my requirements. Among the Book 4 armies, It has adequate number of good shooting troops, some good quality Knights which will be useful in case of need. Even better, its BdS and BwS can support each other when fighting against Foot. Most important of all, regular commands! I had finally made up my mind to use this army.
Army tactics
WotR has its strengths and weaknesses. Its Army ME is small, it is short of Psiloi, and most important, it needs to wear down its enemies primarily by shooting. I would like the enemies coming forward against my army from a narrow frontage, preferably from where I expect them to come.My prepared positions will be waiting for them. I have set up these positions with a wider frontage than theirs, so that I can maximize the combined firepower of my BwS and RArtI. for maximum combat effect in the killing grounds. As WotR has a low aggression factor of one, I would be the defender most of the time and therefore could place a lot of terrain pieces in a way to create the aforesaid killing grounds. I came up with a new idea to use a Isolated Tower, (that is a BUAf, 40x40mm, costing 10AP) that forbid enemy elements to set up within 12cm of it before the battle. BUAf can be placed within the enemy deployment area. The whole purpose is to heavily reduce the area that the enemy troops can deploy in its deployment area by placing a BUAf nearby. If I am lucky enough to place it there, I can use it to distract the enemy deployment plan, or even channel them to the killing grounds. In one test game, my Burgundian Ordonnance enemies could only deploy with 1 command in the front, to be followed by the other remaining two commands. I could just concentrated all my shootings against his command in front, broke it before the second command took its positions, and finally broke his army by fighting with 3 of my commands against each of his command in turns. I.e. typical 3:1 odds of attack.
If the enemy did not follow my ploy, I would make good use of the terrains and my regular troop’s abilities to outshoot the enemy by fighting on battle grounds with a wider frontage than that of the enemy where my boys can provide aid-shooting to the primary shooters. No matter how, my plan was to avoid close combats as long as possible. Close quarter fighting is never the strength of WotR. As my army did not has any Psiloi, the task to clear the Difficult going of enemy troops would be left to my BdS and BwS where necessary.
In summary, my tactics is to make use of terrains and my BUAf to channel the enemy approach, wear it down by shooting before commit my troops into close quarter combat. The theory here wait to be proved in the coming tournament.
Tournament games
Game 1 vs Early Crusaders “ The Duels between Elites”
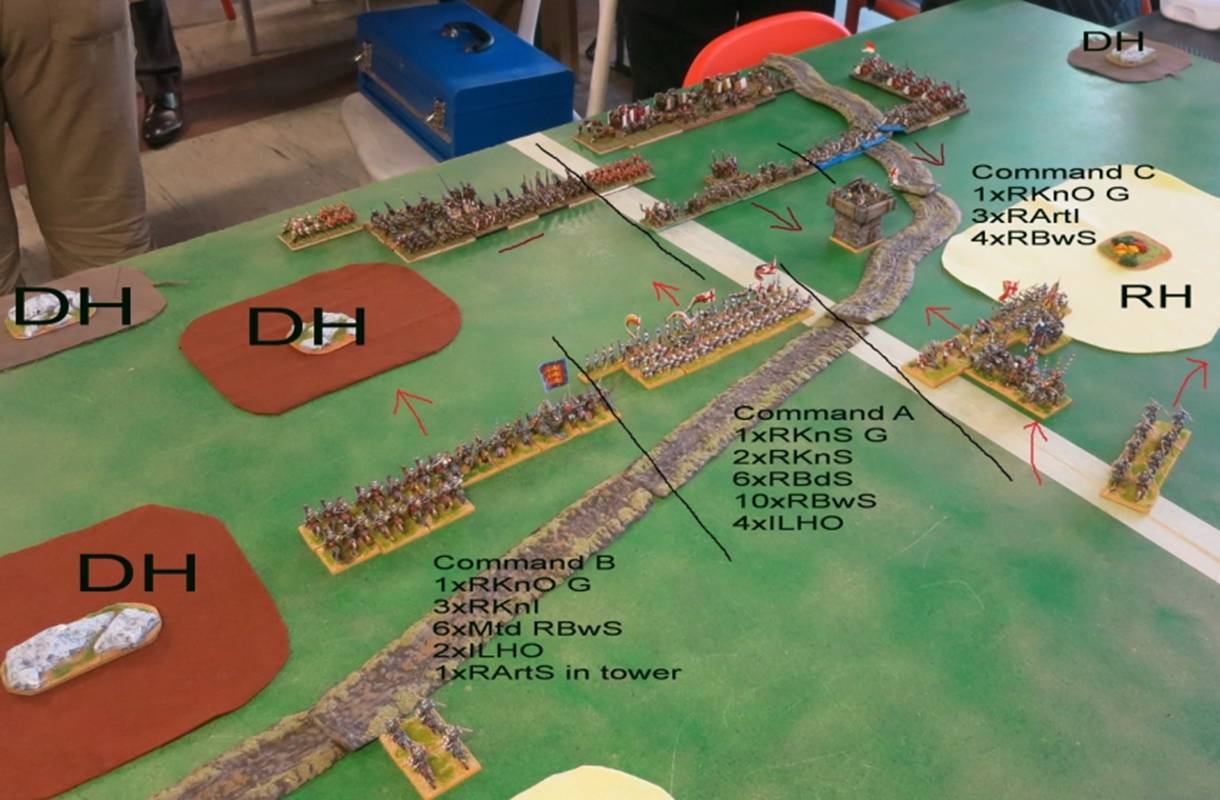
WotR were the defender and I have placed the tower close to the Crusaders’ deployment zone. During the setup, WotR placed their Command B, Command A and Command C from left to right as shown in the photos. The Crusaders placed their BdS command directly in front of my tower, obviously he wanted to storm the tower with his heavy foot. The Crusaders’ ISpI command was placed in the upper left in the photos, as reserves in the rear and the Knight’s command was placed in the upper right facing the open.
WotR had 2 plans. Plan one was to move Command B to face the ISpI and destroy them by shootings. However, since the enemy spear command had been deployed in the rear, if I moved my Command B towards them, I might exposed my flank to the Crusaders’ counterattack which sound risky. The alternative was to use the tower to draw the Crusaders’ BdS forward to the tower. Then my KnS and General would advance and attack them. They have a good chance to kill a few of these 2ME BdS that would break this Command. Therefore, I have chosen the second one.
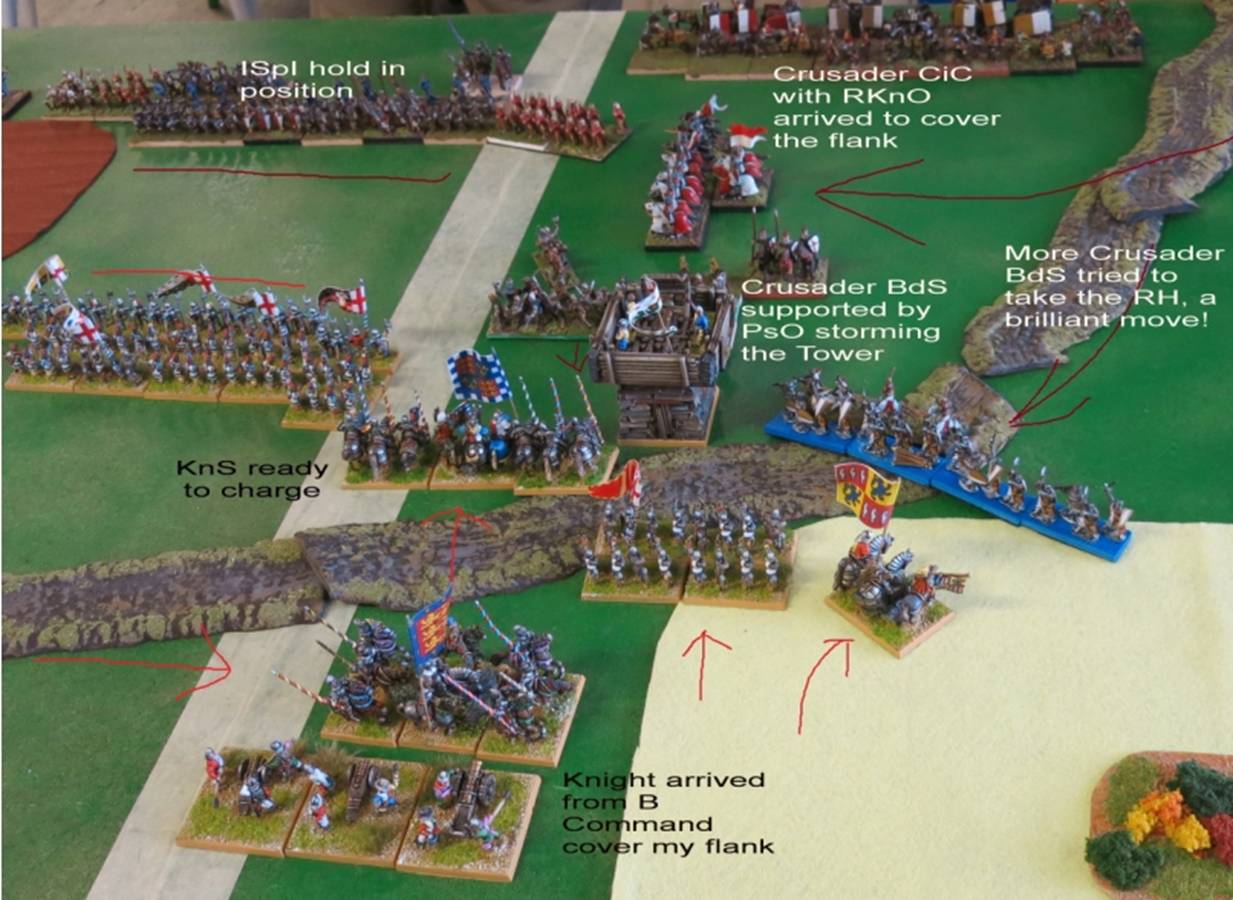
The photos below were taken after the Movement Phase of bound 2. The Crusaders were ready to storm my tower with RBdS supported by PsO.
WotR Knights of Command B took up and reached the flank cover position, the King with his Royal Guard regiment (all RKnS) were ready to charge those Bd storming my tower. Crusader CinC with RknO reached position to cover the flank of the Spear command and part of the BdS tried to take the RH.
The Crusader BdS proved to be a hard nut to crack. WotR knights had been repulsed several times and took casualties. The WotR CinC was lucky to survive a hard flank attack and carried the day later. On the other hand, 2 Crusader BdS bravely stood in the flank, attacked and saved their Command from breaking. In the mean time, the WotR tower has fallen after repeated Crusader assaults.
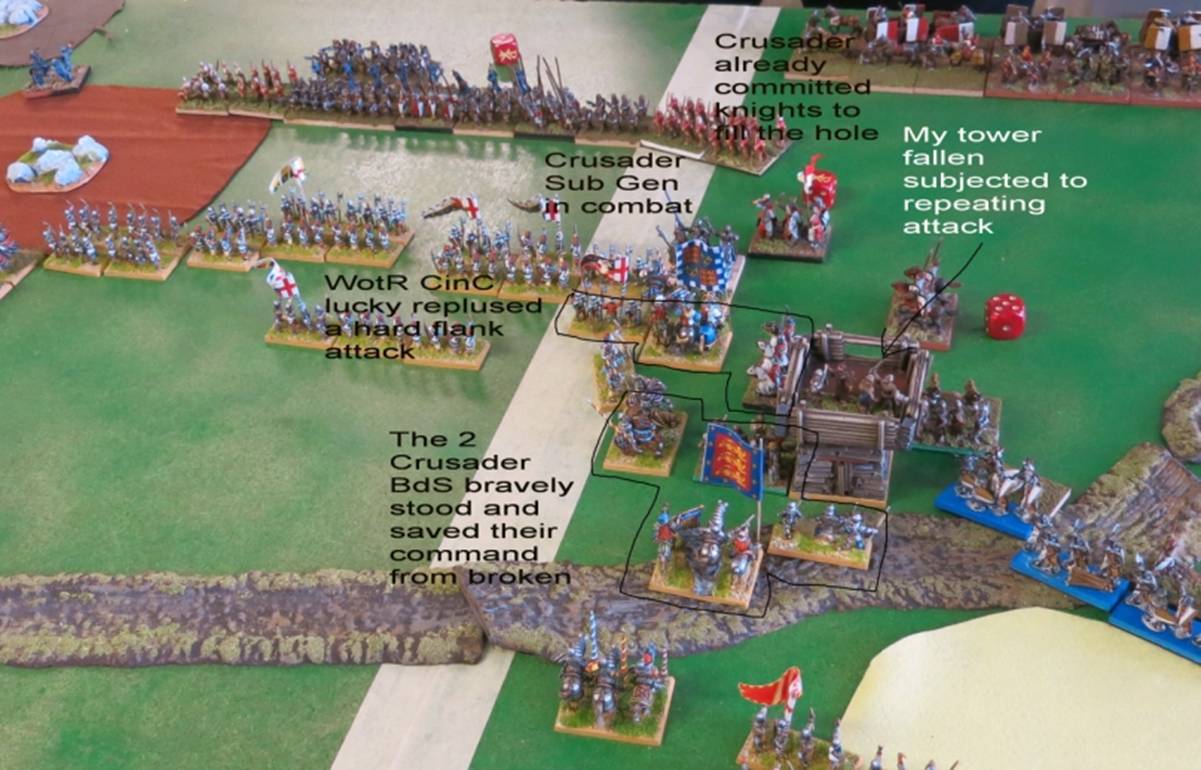
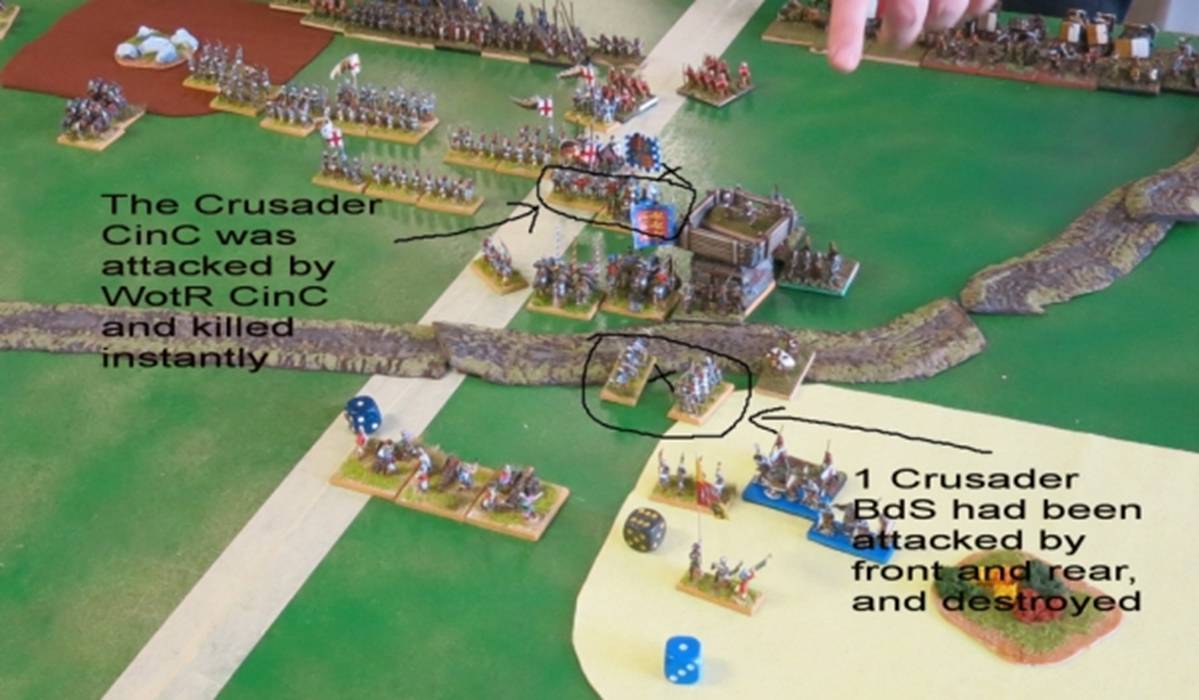
Crusader Sub Gen challenged the WotR CinC and advanced against him without any troops protecting his flank. He was killed in the next bound by the WotR CinC hard flank attack (the first personal combat). The 2 Crusader BdS finally were slaughtered by the third attacks into their flank and their command was broken. However one of the WotR dismounted Knight was killed by a hard flank attack as well, the fight kept going with the WotR in the upper hand.
Finally the WotR CinC fought another personal combat with the Crusader’s CinC. Fighting against the Superior Grade mounted, with enemy overlapping its flank, plus the enemy rolling a SIX for the combat, the Crusader commander was killed. As a result, the whole Crusader army was broken.
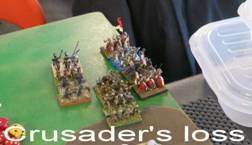
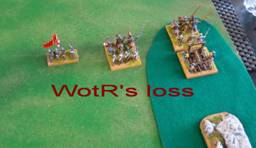
Heavy casualties for the 2 sides:
The game summary
The WotR tower was a distraction to the Crusader’s plan, it attracted his attention and the Crusader had committed a whole command to storm and attack it. It created an opportunity for the WotR to fix a decision point and committed their elites as well. The narrow frontage of the -battlegrounds had favored the WotR as they had only a handful of their elite Knight units, the Crusader had committed their elites set piece (first came the BdS, then came the KnO, and finally their commander) and their Commands were broken one by one. However the tower had fallen quickly plus the tough fighting of the BdS exerted lots of pressure to the WotR side to the extent that, even their CinC had been hard flanked. He survived only because of luck.
Game 2 vs Ghurid “No surrender!!”
“I was losing the battle at 5 o’clock, but I won it back at 7!” Extracted from the film “Battle of Waterloo” when Napoleon commented on his Battle of Marengo.
I have played Ghurid in my testing games with the impressions that their IPkX were good vs BwS, Kn and other troop types except BdS. They can only fight up to 3 ranks but not 4 ranks. They do not have enough punching power to prevail against BdS. Don’t forget that Pike can be quick killed by Bd in enemy bound. Therefore I did not choose to use this army in ITC. So when I knew that I would fight Ghurid in this round, I thought I have a good chance of winning before the game
As usual, WotR defended and deployed first. Unfortunately I failed to place my 2 roads and the tower can only be placed near the short table edge. It did not serve its intended purposes for the whole game. I had set up my army on the right hand side and Ghurid had deployed on the opposite corner. When we started to play, I rushed my army towards the open area on the left hand side. I intended to take the gentle hill if possible, or attack the Pike blocks from their flank. I sent my ILHO to take the gentle hill first, to be followed by my bowmen. With hindsight, it was a big mistake to do so. It made me to move these elements of my command A to the open and had stretched my line too wide and thin. I also lost the mutual supports from my Command B who had set up on the far right hand side. Even worse, my ILHO was no match to Ghurid’s ILHS and my BwS was no match to Ghurid’s PkX.
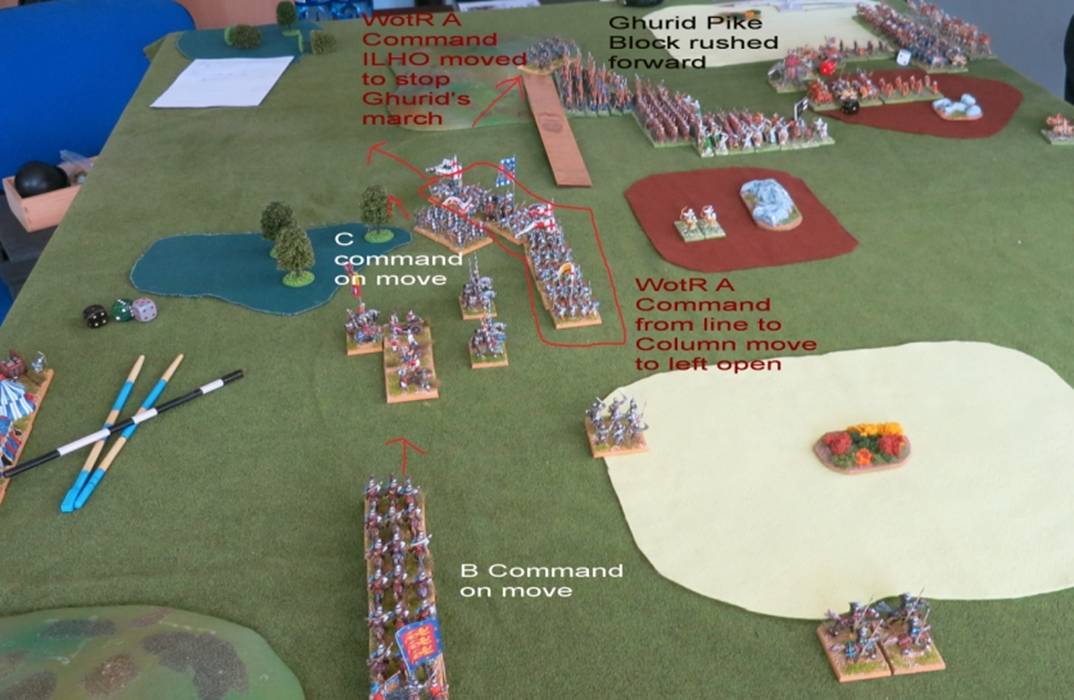
Ghurid commander wisely took advantage of the opportunity and sent all his forces to storm against my thin defense line. I lost my ILHO quickly to Ghurid’s ILHS and my bow line could not held too long against Ghurid PkX. With the WotR RBdS on the way to reinforce my front line, situation looked grim for the WotR.
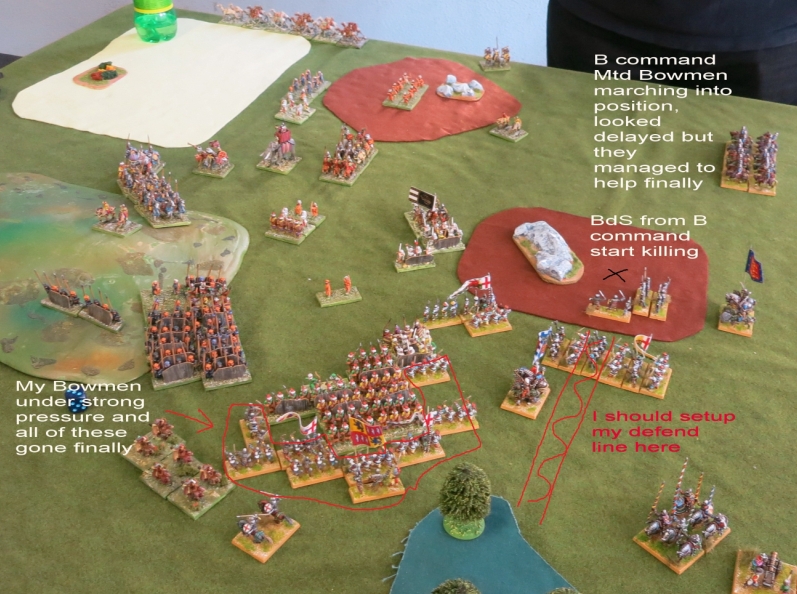
In the mid game, WotR army was closed to broken. Its Command A had lost 12 ME out of 36 and its Command A had lost 4 ME out of 12. Both of them became disheartened and was on the verge to be broken. In addition, the WotR Baggage Command was looted by the Ghurid Light horsel. Meaning that 1 or more ME loss on either Command A or Command C would break the WotR army. At this moment, the Ghurid losses were mild, my guess was probably only 2-3 ME. Several times I wanted to throw in my white towel and took a break.
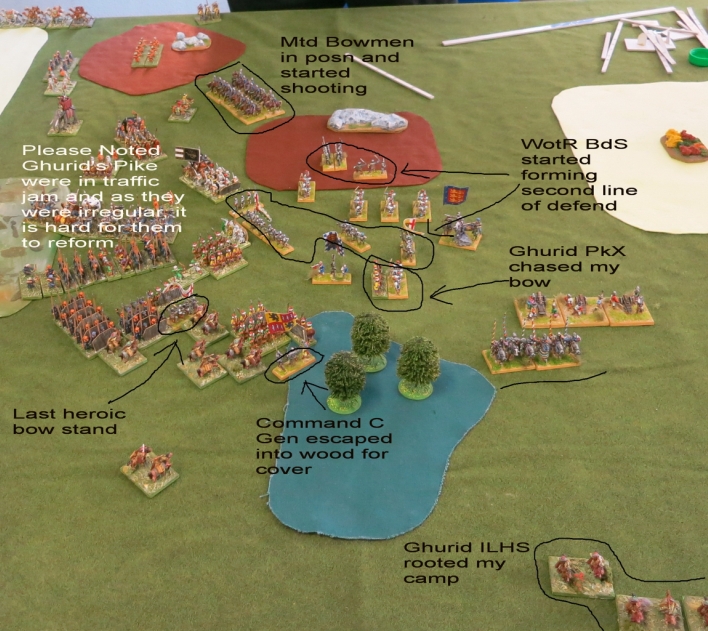
My team spirit reminded me of my responsibility to other team members. Even a few points more for this game matter as every points counted for my team’s final score, so keep on playing until defeated. I started to counter-attacked with my BdS who destroyed the Ghurid’s Pike one by one. There is a saying that “ God help those who help themselves”. From this moment on in this game, my dice throws did not failed me anymore. I must stressed that I would lost this game even by just one unlucky dice roll in one of my BdS combat (such as I rolled 1 and he rolled 6). But my boys did not failed me and they kept fighting on. The climax of the Battle came when 2 Ghurid’s ILHS attacked 2 of my RArtI (who were disheartened) at the modified combat factor of 3 for him and 1 for me. Even worse, my Art would be quick killed if he won this combat. However I rolled 2 Sixes for both Art, and won the combats, thereby repulsing the Ghurid’s attackers. Thanks God! The General of My Command C had also managed to survive from an attack by the enemy’s Pike and LH inside the woods that came from both its front and its rear. I may lose him even though my modified combat factor were higher than him. I can remember the joyful moment now.
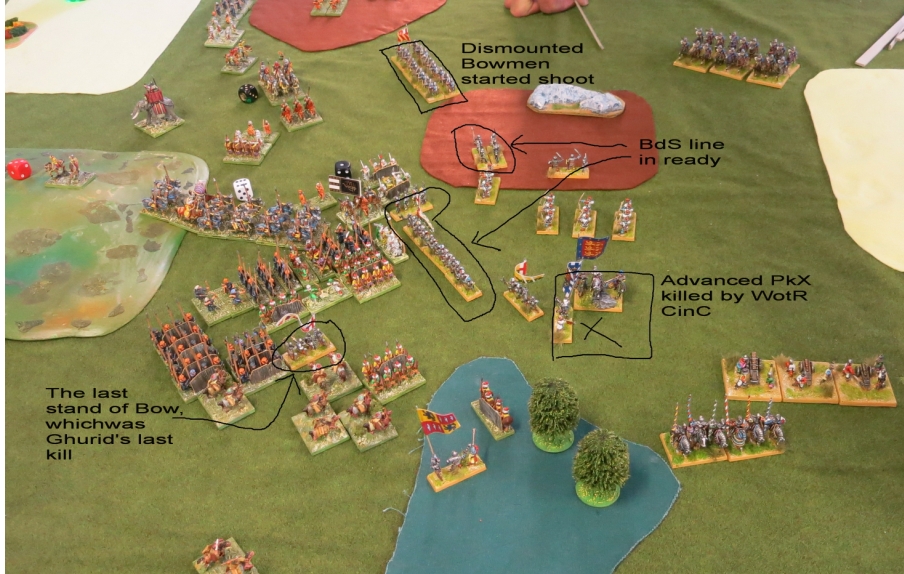
WotR finally managed to break 2 of the 4 Ghurid’s commands and inflicted more than 40% of Ghurid’s Total ME The losses was close to the Ghurid’s army’s break point. It must be emphasized that in the last few bound, even one bad dice roll of WotR would cost them to lose the game.
After thoughts
I made my mistake in my first moves that made me almost lost this game. With hindsight, I should set up a defend line across the open between the central hill and the wood and fought the battle in the short table edge instead. As my BwS supported my BdS, the PkX could only attacked my BdS supported by BwS at combat factor of 5: 5 but I could quick killed the PkX with my BdS in my bound. The risk would be lower by doing so. If this was a friendly game, I would probably conceded during the mid game. But for team play, I need to contribute as much score as possible. This kept me to carry on, and finally turned the table in my favor unexpectedly. On that night I remembered the Battle of Marengo. Its course of event and the outcome were similar to that for this game. So I learned my lesson: Never quit in DBMM! you never know what will happen next. Thanks God! I was very lucky in this game.